Showing posts with label frugal ideas. Show all posts

Tuesday, September 18, 2012

Frugal Breakfast: Sausage Biscuits & Gravy

So many people feel that making biscuits and gravy is difficult... well it's not, not even a little.


First if you are using refrigerated biscuits (my Grandma calls them 'Whop Biscuits'  lol)  pop them open, put them out on your cookie sheet .. if you like them with a crust all the way around bake them 2 inches apart, if you like some of them softer then bake them closer together so that they touch.   Either way don't put them in yet, just set them aside and start your oven preheating.

For the gravy:

1 lb. Sausage (I use Jimmy Dean HOT sausage)
Flour
Milk

Brown sausage in skillet (start out with a skillet large enough to hold the finished gravy).  Once completely browned, if using Jimmy Dean you will not have any fat, which is important for this, so I usually end up adding a 1/4 cup vegetable oil.  Or you can use half JD sausage and half other type of sausage that has more fat content.)

Add flour to the skillet... mix enough flour into the fat to not be too runny and not be too solid.  I know, I know, not real helpful, but you'll get the idea once you start working.

Allow flour to "burn".. not really, but you do want it to get so dark that you're sure it's burnt.

Now add your milk. I don't know why it makes a difference, but it always comes out better if you pour your milk over a wooden spoon.  Maybe it allows the milk to not hit the hot pan so hard, I don't know, but my Grandma always did this, so I do too.

Add Salt and Pepper your skillet...   and stir with a wooden spoon.
This will take some time.
Your flame should be medium.

Put your biscuits in the oven.. don't forget to set your timer.

Keep stirring your gravy... as it thickens you will want to keep stirring the thickened part off of the bottom.

If your gravy doesn't start to thicken, get a cup add a half cup or so of cold water and a Tablespoon of flour.. whisk it up and pour into your gravy.

Keep stirring.

You'll know it's finished when your gravy is the consistency you can live with.  It will thicken more once it starts cooling.

Your biscuits should be ready.

Serve hot with an egg or two.

Breakfast of champions. :)


Saturday, September 15, 2012

Food Stretch: Four Chicken Breasts = Four Dishes/Six Meals

I purchased a package of four chicken breasts for $7.23.

First I browned them in a skillet, to enhance the flavor.
Then I put them in my crock-pot with a container of chicken stock, sliced carrots, diced onions and diced celery..... salt and pepper.
Cooked on high for about six hours.

Meal One: Chicken Stew served with wheat crackers.

Next night ... reheated in crock-pot.. added in two packages of rice mix (chicken flavor)   served with wheat crackers (yes we like wheat crackers! lol)

Meal Two: Chicken and Rice

Third night ... put leftovers in skillet, added some water, bowtie pasta (any pasta will work) and broccoli... put on lid and let simmer until pasta is cooked.

Meal Three: Chicken Pasta and Broccoli Skillet

Chicken Pasta & Broccoli Skillet


Fourth night ... put leftovers in baking dish, mixed up a biscuit dough from scratch
(simple biscuit recipe:  2 cups all-purp flour, 1 Tblsp baking powder, 1 tsp salt, 1 Tblsp sugar, 1/3 cup shortening, 1 cup milk)  spread biscuit dough over chicken dish.

Bake at 425 degrees for about 13-15 minutes until biscuit top is golden brown.

Fourth, Fifth and Sixth meal:  Homemade Chicken Pot Pie

The chicken pot pie lasted us for three meals. :)  So I guess four chicken breasts actually made us six meals.


And that is how I stretched four chicken breasts into four dishes and six meals for two adults.


Tuesday, September 11, 2012

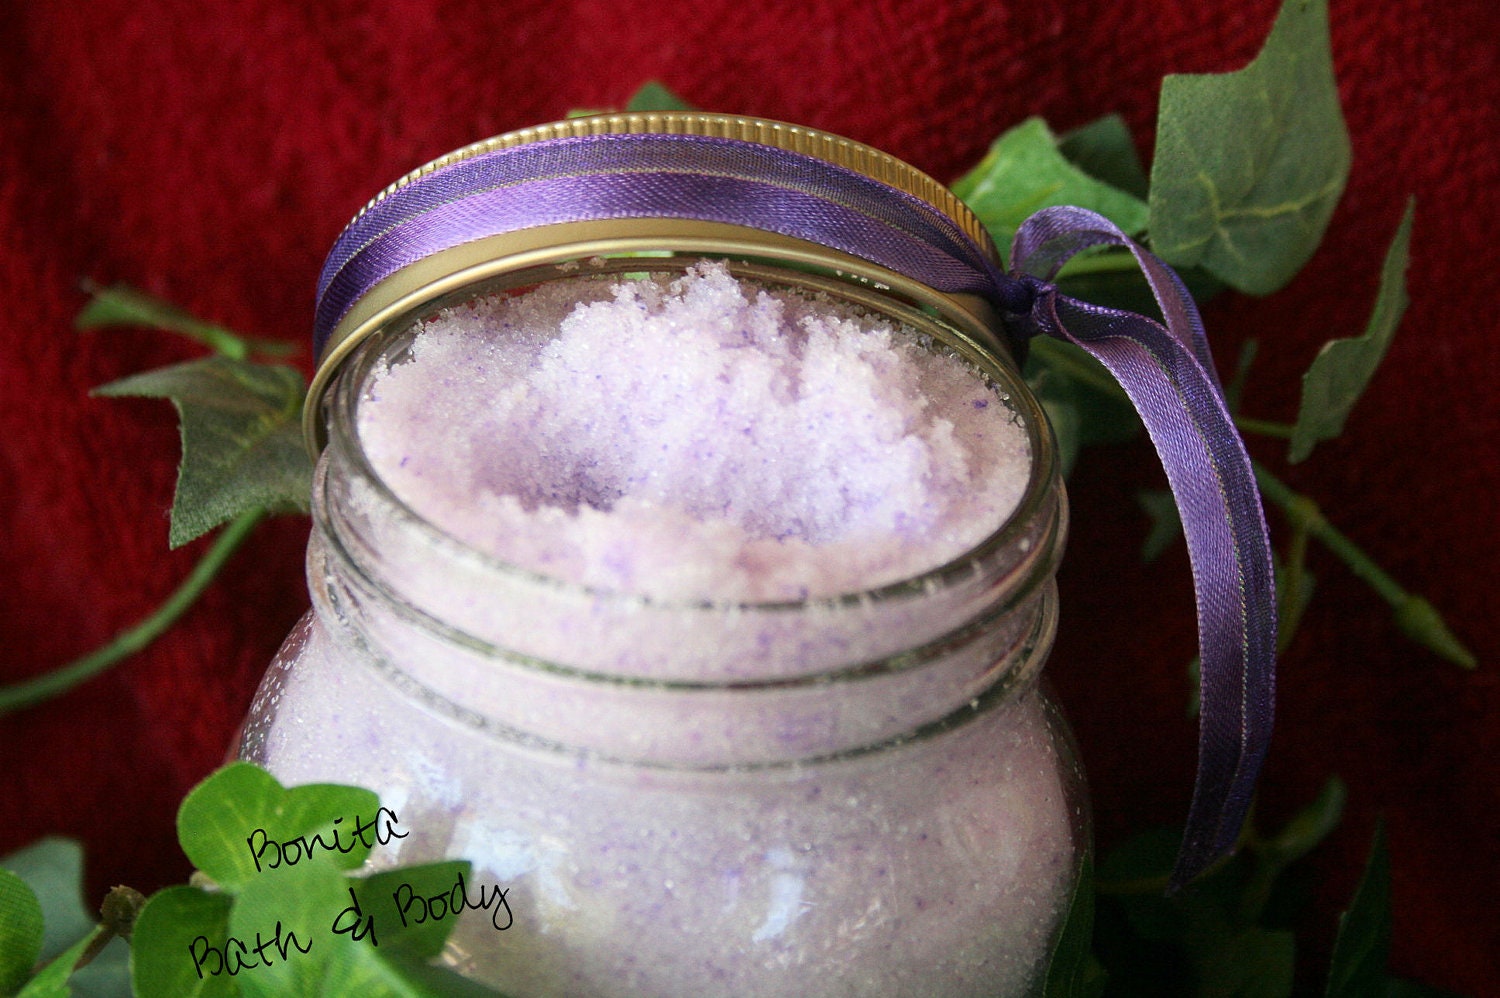
Great Gift Find: Homemade all Natural Sugar Scrubs

These scrubs are handmade by my Mom. :)  They are all natural, come in a 16oz jar and make your skin feel amazing! We live in the southwest desert. It is so easy for my skin to dry out, but using these scrubs helps keep my skin soft and supple and not dried out!

These make inexpensive gifts at only $8.00 each!  Great for the teachers, babysitters, bus drivers and everyone else on your list!
She offers the following scents/essential oils, at the moment, and is adding more all the time. If you want a scent she doesn't have listed, just ask! She'll do her best to find it for you!

The Peppermint is wonderful for use all over your body, makes your whole body feel so alive and soft!

The Brown Sugar scrub is pure luxury on your body and simply scrumptious for your face!  


The Lavender is so fragrant, you'll feel calm and relaxed after using this one!


Other scrubs available:
Honey - Simple and really great for your face!
Tea Tree Oil - Wonderful for waking you up!

To order visit my Etsy Shop and look under Bonita Bath and Body


Tuesday, September 4, 2012

Make Your Own Steamer Bags {Caution HOT}

I love fish, and yes fried fish is just awesome, but sometimes I want a nice piece of flaky fish, especially salmon,  that hasn't been fried but I don't want to go through the hassle of turning on the oven, preheating... you get the picture.  So, what I do instead is take my fish fillet, season it with whatever I'm feeling like at that moment, then toss in a zip storage bag and microwave for 3-6 minutes (watch it, you don't want it over done).  It comes out perfect every  time!  
I got this idea from the steamer bags they sell... and even Ziploc brand has steamer bags you can buy now, but I didn't have any of those so just made my own using a zip bag.  Worked liked a charm.  Initially I zipped it completely closed, but the bag blew up so much I was scared it was going to explode, so I left the zip open in the middle about an inch or so.  Was delicious fish and no mess to clean up afterwards!  Be warned bag is HOT when it comes out, use an oven mitt to handle.


We had our steamed salmon, a fresh salad, with fresh feta crumbles!! and a baked potato and some green beans.  It was awesome!


Sunday, November 21, 2010

Peanut Butter Truffles


Peanut Butter Truffles

Ingredients
1 cup Peanut Butter, reduced sodium , chunky or creamy 
4 tbsp Butter, unsalted , softened 
12 oz Baking Chocolate, bar, bittersweet , cut into small pieces (or semisweet chocolate chips) 
1 cup Cocoa Powder, unsweetened 

Directions
1 Using an electric mixer, combine peanut butter and butter until creamy.
2 Spread the mixture into a 2-inch-deep baking pan and let freeze for 30 minutes or until firm (it should have the consistency of fudge). 
3 Scoop balls out of the mixture using a melon baller or small spoon. 
4 Arrange on a baking sheet covered with wax paper. 
5 Re-freeze balls for 15 minutes or until hard. 
6 Take balls out of freezer and roll between your hands to form even spheres, (try to do this fast, or they'll become too soft).
7 Place the truffles back in the freezer while making the chocolate glaze. 
8 Add the chocolate to a large bowl over a pot of gently boiling water and whisk frequently, until the chocolate is completely melted. 
9 Take chocolate off of the heat and let rest at room temperature, stirring frequently, until the chocolate starts to firm up at the edge of the bowl. 
10 Dunk the truffles into the melted chocolate and coat fully. 
11 Take them out with a fork, letting extra chocolate drop off. 
12 Coat immediately with cocoa powder. 
13 Arrange truffles on a lined baking sheet and let them set in the refrigerator for 5 minutes.
Additional Information
Truffles will keep for about 2 weeks, chilled or at room temperature, when stored in a tightly sealed container.

Dietary Exchanges
1 1/4 Fat, 1/4 Other Carbohydrate